
One of the best interests I ever followed through on was learning how to sew. It’s empowering to be able to make your own clothes and to make the clothes you buy fit perfectly. I tend to make a beeline for the $10 pile in an op shop that are full of beauties that need a zip replaced or torn seams repaired – they no longer seem disposable, but full of opportunities to make like new again. It also changes the way you view your body – it’s no longer about changing yourself to fit the clothes, but changing the CLOTHES you fit you.
Warning: Photo heavy post ahead!

Although I gave glimpses into the labor of love of my most recent dress on my Instagram, I though it would be fun to take you through the creative process of that which was The Dahlia Dress (trust me, it deserves capitals). This one was particularly special to me, because it was one of the first that didn’t come from a pattern. Rather, I drafted the pattern myself with the help of the incomparable Sandra of Sewanista Fashion Workshops (who also happens to have a new blog – check it out here!)
To Start With…
You always start with a vision. Whether it’s a sketch or a design you’re particularly inspired by. This dress was inspired from a 1950s vintage dress that was miles too small for me. But, I would not be thwarted. Years later, one design feature of that dress really stood out for me, which was this amazing criss cross feature at the waist made from separate panels of fabric. I was determined to incorporate this into a dress design someday…and the seedling for this dress was planted.

Next step: The Fabric. I scoured all of my local fabric stores for the perfect border print. Now, if you follow my Instagram, you will know that I’m obsessed with border prints. A border print was particularly important for this dress, because I wanted to carry the deeper colors from the border print into the waistline detail.
I didn’t have any luck at the local fabric store…but then I discovered Spoonflower (pause for choir of angels to sing). Spoonflower is an AMAZING website that prints custom prints on a range of fabric types. You can either come equipped with your own fabric design or choose from their marketplace, where you’re supporting indie artists. They have a range of different fabrics and if designing a print isn’t your thing, you can (and will) lost HOURS browsing the available designs. It’s basically fabric porn. I found the world’s most perfect print to suit my vision:

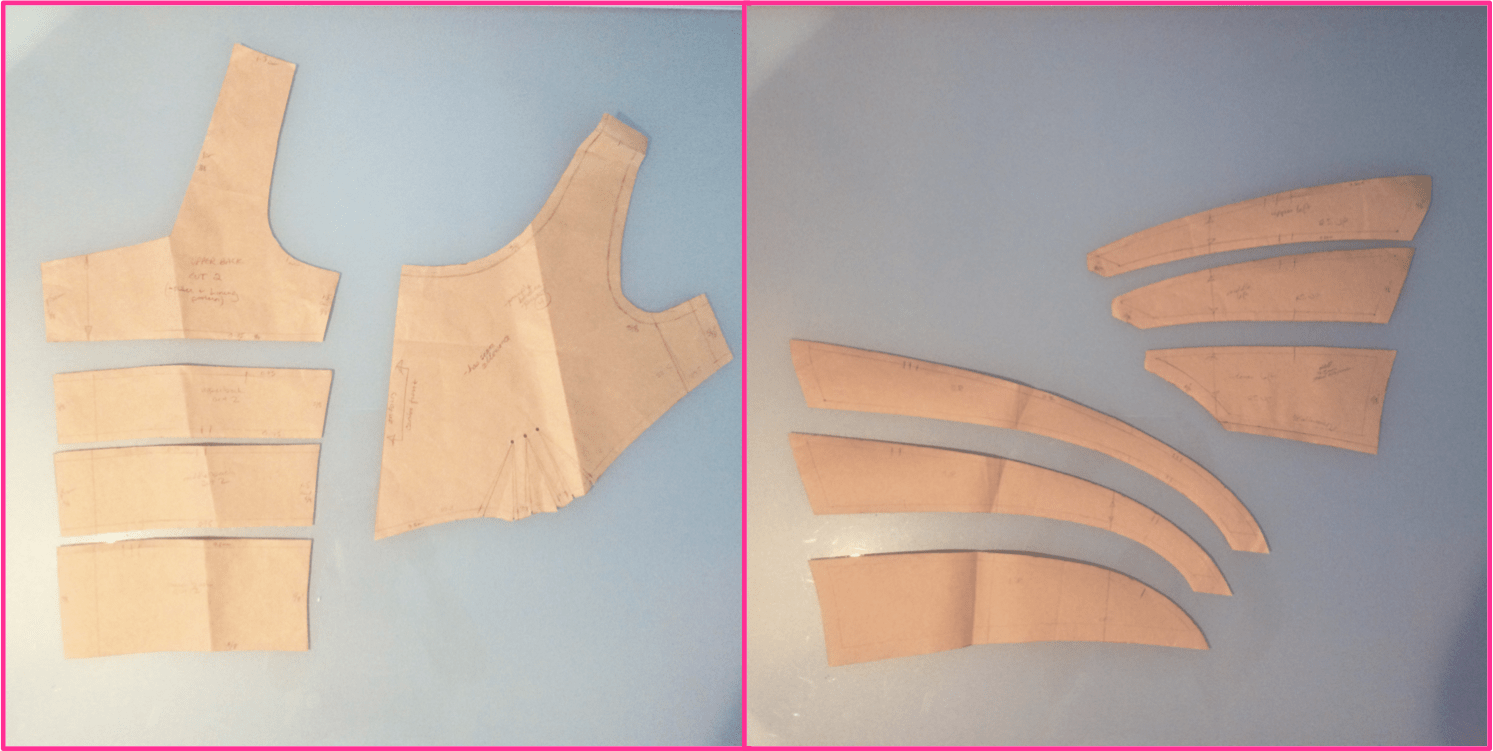
The Drafting & Print Placement
This part always requires many many starts and stops and fittings. the first step is creating what we call a block. A block is basically the baseline pattern that fits your measurements perfectly that you will then base all future patterns on. I luckily had my block…which let me go right into the pattern work.
The trickiest part of this dress was the criss cross detail on the bodice. I really wanted it to curve in at the front for a beautiful waist definition and for there to be piping in between the pieces to break up the print and add some textural detail. Well, that’s A LOT of stuff. You have to work with seam allowances for each piece and the added bulk the piping provides. On top of that, I wasn’t happy with any of the pre-made piping I could find (of course not!) so I made it myself from bias cut pieces of eggplant-tone cotton and my zipper foot.
When you have a large, bold print, the placement of it on your dress is very important. This is where I got sneaky and used the template feature in Dressed to test print placement. It let me choose a similar silhouette and, using the camera feature, overlay the print wherever I pleased. Though perhaps not its original intention, I use this feature of the app constantly for design projects…

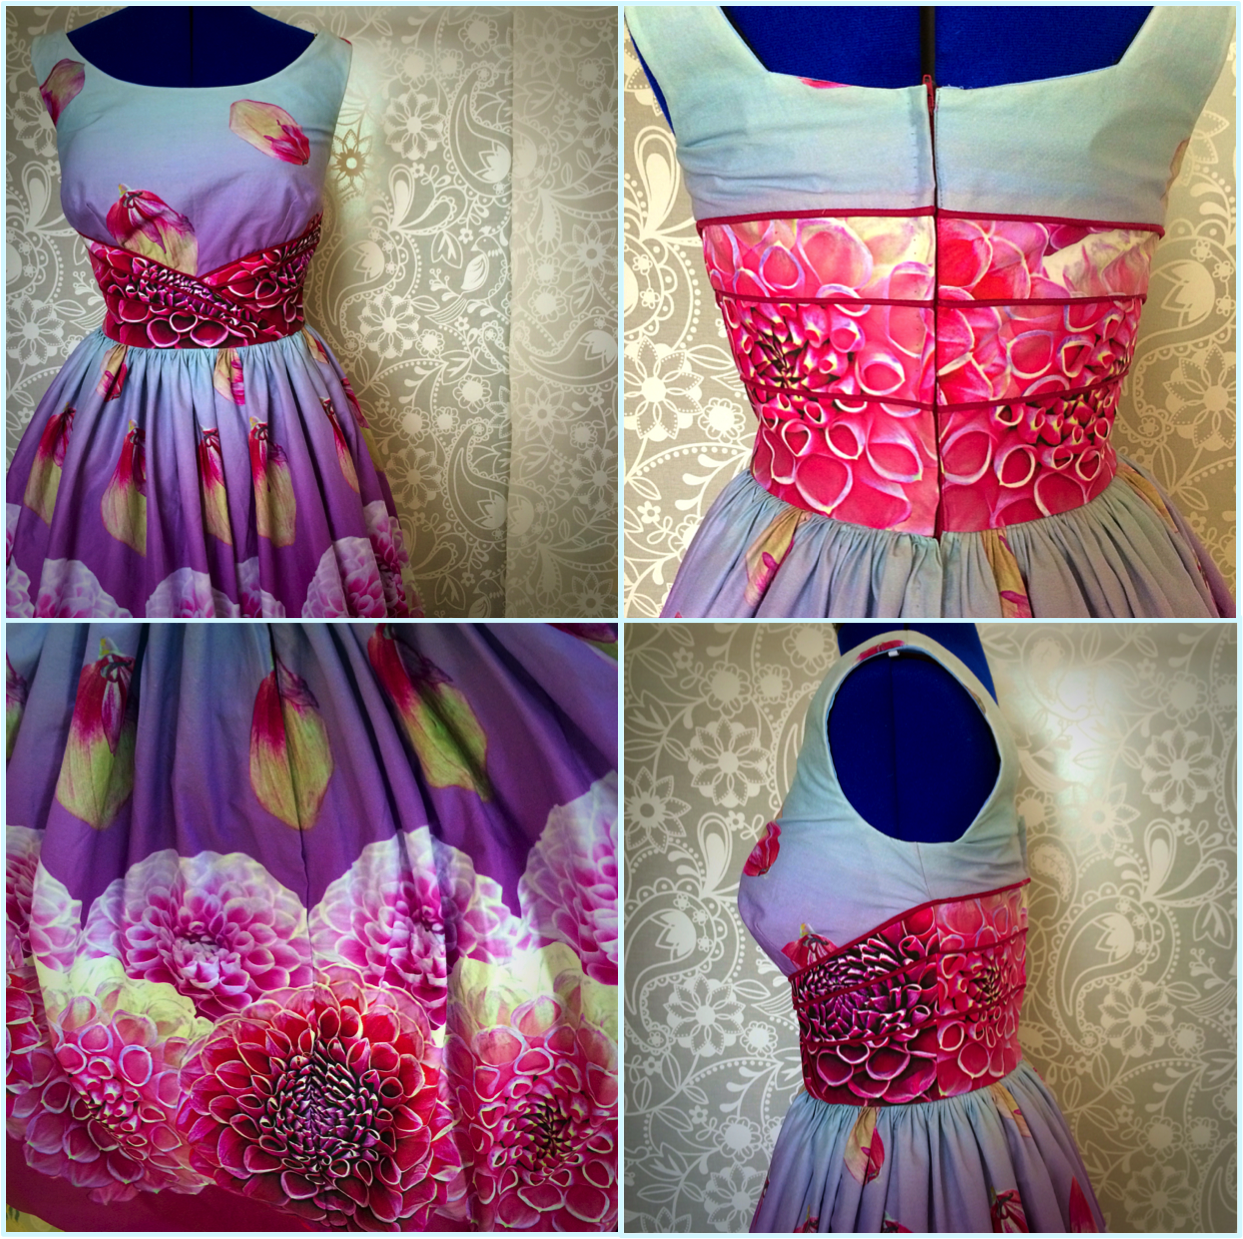
The Construction
Actually putting the dress together took a considerable amount of time. In part because I was constantly traveling for work and in part because there were so many bloody pieces! We used interfacing on each of the bodice pieces to give them additional structure, attached the piping to each, and sewed the pieces together from the bottom up. Then, I attached bias tape around all of the curves for stabilization and finally, used a sky blue cotton voile to line the dress and hide the mess.


The skirt was one of my favorite parts. I finally (FINALLY) invested in a ruffler foot (Bernina Ruffler #86), which is hands down one of my most favorite sewing tools to date. If I haven’t made it clear, I LOVE a full, twirly skirt. Seriously. The fuller the better. If I can’t fit two or three crinolines under it, what’s the point? That level of full.
So, we measured the amount of yardage I had left after the bodice pieces were cut and ran a series of tests on miniature skirts with varying ruffle widths to see how much each ruffle setting would scale down the yardage. Turns out, mini ruffled skirts are awfully cute. Then, we did the math on the ideal ruffle width that would take our 3.5m of fabric and scale it down to the 28″ we would need for the true skirt waist circumference.


The Details
Whenever I see a vintage garment, the things that make my heart sing are the attention to detail. So, though it took a ridiculous amount of time, I was most proud of the care that we put into the pattern matching (which is where print matches up at the seams) and carefully lining up of the piping.
After that, the final touches involved adding a zipper, stitching a hook an eye at the top of the dress, and finishing the hem. For this, I went with a simple rolled hem. Then, as the final touch, I sewed in snaps onto the shoulder that would keep my bra in place. Aaaaand then of course gave her a good steam – she had definitely been through a workout!


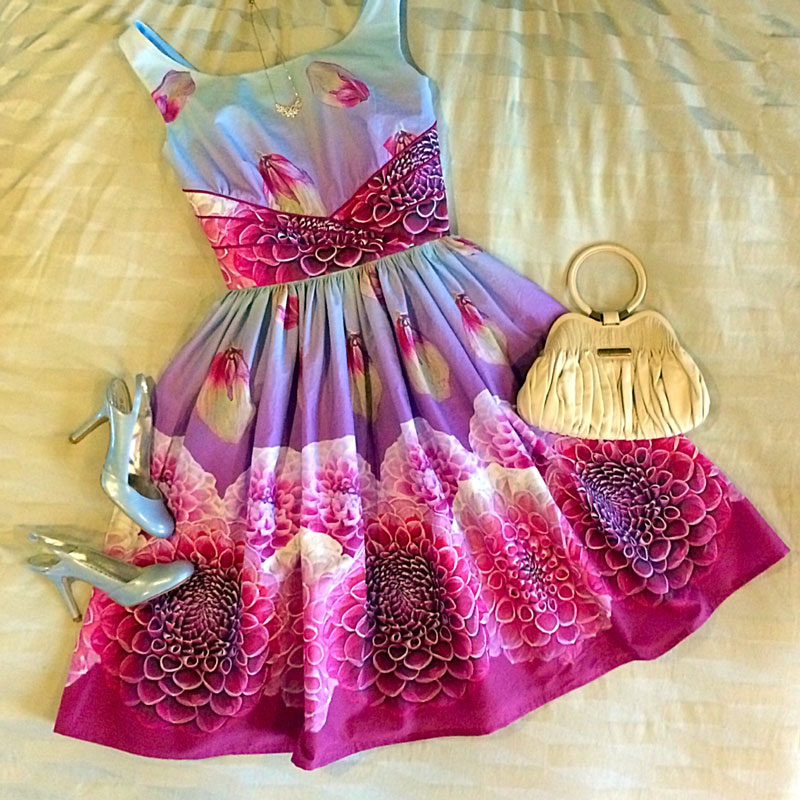
Styling the Finished Product
Next came the fun part – getting to wear the dress! I spent a bit of time mixing and matching various accessories in Dressed and then got to proudly debut her to the world.


This dress is literally one of my proudest moments as a sewing enthusiast. And though it took months to finally bring to fruition, I appreciate her all the more for the work that went in. There truly is something amazing about delayed gratification. About having to put time and care into every stitch and step of the process, which makes a garment a piece of you as opposed to just a disposable item that you wear for awhile and discard. I can only hope that someday a century from now, someone comes across this piece in a vintage shop and marvels at the work that went into it.
If you have any questions or want additional details on a particular technique, please leave a comment below.
Happy Sewing!
xoxo
Construction Details:
Fabric: Spoonflower
Pattern: Drafted by me, with Sewanista
Additional fabric & notions (piping, zippers): Textile Traders
Sewing Marchine: Bernina Activa 220
Outfit Details
Handbag: Vintage (similar here and here)
Shoes: Madden Girl via DSW (similar)
Bracelet & Necklace: Swarovski, both gifts from my Mr.
.
instagram // twitter // facebook // pinterest
